

How to assemble a cloth shop rack?
As a seasoned supplier of Cloth Shop Racks, I've witnessed firsthand the transformative power of a well - assembled display in a clothing store. A properly set - up rack not only showcases your merchandise effectively but also enhances the overall shopping experience for your customers. In this blog, I'll guide you through the step - by - step process of assembling a cloth shop rack, ensuring that you can create an attractive and functional display for your store.
Step 1: Gather Your Tools and Materials
Before you start the assembly process, it's crucial to have all the necessary tools and materials at hand. Typically, you'll need a set of screwdrivers (both flat - head and Phillips - head), a wrench, and possibly a hammer. As for the materials, you should have the cloth shop rack components, which usually include vertical poles, horizontal bars, connectors, and sometimes shelves or hooks. Make sure to check the packaging carefully to ensure that you have all the parts listed in the instruction manual.
Step 2: Read the Instruction Manual
It might seem like a no - brainer, but reading the instruction manual thoroughly is essential. Each cloth shop rack model is different, and the manual will provide specific guidance on how to assemble your particular rack. Pay close attention to the diagrams, which can help you visualize the assembly process. If you have any questions or if the instructions seem unclear, don't hesitate to contact our customer support team for assistance.
Step 3: Prepare the Assembly Area
Choose a clean, flat, and spacious area for assembly. This will make it easier to lay out the parts and work on the rack without any obstructions. Clear the area of any debris or objects that could get in the way. If possible, lay down a soft surface like a carpet or a piece of cardboard to prevent scratching the rack components.
Step 4: Assemble the Base
The base is the foundation of your cloth shop rack, so it's important to assemble it correctly. Start by connecting the horizontal bars to form a rectangular or square base, depending on the design of your rack. Use the provided connectors and screws to secure the bars together. Make sure the base is stable and level before proceeding. You can use a level tool to check if the base is perfectly horizontal. If it's not, adjust the legs or use shims to level it out.
Step 5: Attach the Vertical Poles
Once the base is assembled, it's time to attach the vertical poles. Carefully insert the poles into the pre - drilled holes in the base. Make sure they are inserted all the way down and are perpendicular to the base. Use screws or bolts to secure the poles to the base. Double - check that the poles are straight and firmly attached. You can use a plumb line to ensure that the poles are perfectly vertical.
Step 6: Install the Horizontal Bars
With the vertical poles in place, you can now install the horizontal bars that will hold the clothes. Slide the bars onto the connectors on the vertical poles. Depending on the design of your rack, you may need to adjust the height of the bars to accommodate different types of clothing. Use the provided screws or clips to secure the bars in place. Make sure the bars are evenly spaced and level.
Step 7: Add Shelves and Hooks (if applicable)
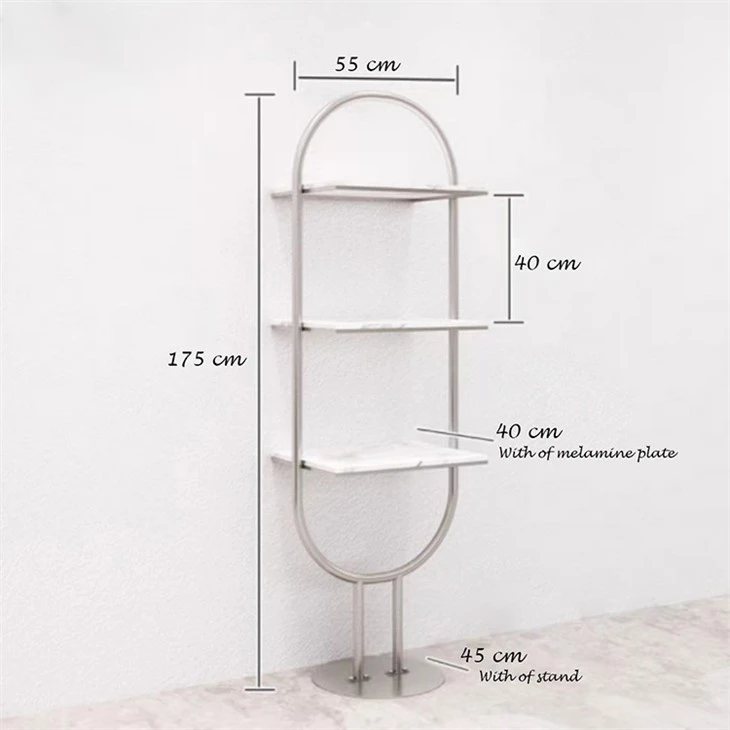
If your cloth shop rack comes with shelves or hooks, this is the time to install them. Shelves can be used to display folded clothes, accessories, or promotional items. Hooks are great for hanging individual garments or belts. Follow the instructions in the manual to attach the shelves and hooks to the rack. Make sure they are securely fastened and can support the weight of the items you plan to display.

Step 8: Check for Stability
After assembling the rack, give it a gentle shake to check for stability. If the rack wobbles or feels unstable, go back and check the connections. Tighten any loose screws or bolts, and make sure all the components are properly aligned. A stable rack is not only safer but also more likely to last longer.
Step 9: Arrange Your Clothing
Once the rack is assembled and stable, it's time to arrange your clothing. Start by grouping similar items together, such as shirts, pants, or dresses. You can also arrange the clothing by color, size, or style to create an organized and visually appealing display. Consider using hangers that match the style of your store for a more professional look.
Step 10: Final Touches
Take a step back and look at the overall appearance of the rack. Make any final adjustments to the clothing arrangement or the position of the rack in your store. You can also add decorative elements, such as signage or plants, to enhance the visual appeal of the display.
In addition to the basic cloth shop rack, we also offer a variety of other retail shop furniture that can complement your display. For a modern and sleek look, check out our Minimalist Clothes Rail. If you need additional display space for folded items, our Stackable Wooden Tables are a great option. And for displaying retail bags, our Retail Bag Display Stand is both functional and stylish.
We understand that every clothing store has unique needs, and we're committed to providing you with high - quality products and excellent customer service. Whether you're a small boutique or a large chain store, we can help you create the perfect display for your merchandise. If you're interested in purchasing our cloth shop racks or any other retail shop furniture, we invite you to contact us to discuss your requirements. Our team of experts will be happy to assist you with product selection, customization, and any other questions you may have.
References
- General knowledge of furniture assembly techniques.
- Experience in supplying cloth shop racks and retail shop furniture.